MSX2 personal computer "SANYO PHC-77 (WAVY77)" with built-in MSX-Write and integrated printer
Retro personal computers and microcomputers that we loved
The keyboard is like a lid, and when you open it, it looks like this. It may be said that it is not a folding mobile phone, but a folding personal computer.
This corner looks back on memorable, nostalgic microcomputers and personal computers with photographs. This time, we took up the MSX2 personal computer "PHC-77" with built-in MSX-Write released by Sanyo as one model of the WAVY series. Released in 1986.
In 1987, the MSX2 personal computer was developed into a lineup divided into two types: an affordable model that can be purchased for around 30,000 yen, and a separate type that was sold for over 100,000 yen. was doing. FS-A1 is famous as the former, but Sanyo's WAVY77, also known as the PHC-77, was introduced to the market as a word processor computer classified as the latter.
In the advertisement, the "word processor/computer" was pushed to the fore. The photos are also stylish, and the shogi software "Kitahei" (SPS) that matches the atmosphere is placed.As a hardware aspect, although the main unit and keyboard are integrated at a price of more than 100,000 yen, the keyboard can be folded to the top of the main unit, and the attached handle can be removed. It had an unprecedented shape that could be grasped and carried.
Speaking of MSX computers with handles, the first generation H1 released by Hitachi is famous, but the weight of the H1 was about 3.5 kg, whereas the WAVY77 has a built-in printer. Above, about 4.7 kg and weight has increased by more than 1 kg. Considering the weight, it seems that the WAVY77 was intended only for movement within the home, rather than taking it out of the house and carrying it to a friend's house for use.
The keyboard is folded closed. The logo was placed in the correct position when viewed from the back.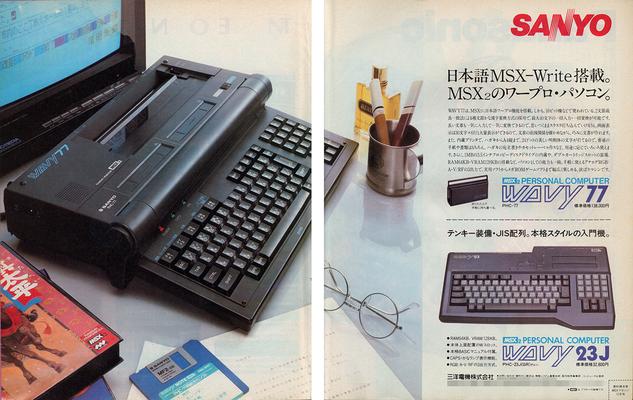
The printer, which occupies half of the main unit, uses a 24-dot thermal transfer system, and was able to print characters from postcard size to A4 in Mincho typeface. At that time, it was still the time to actively send out summer greeting cards and New Year's cards, so some people may have purchased this machine under the pretext of writing addresses and writing letters on behalf of them.
In addition to having two cartridge slots on the top and one 5-inch FDD compatible with 2DD on the right side, the main memory was 64KB and the VRAM was 128KB. In addition to analog RGB, the screen output method was also equipped with composite output and RF output. Considering that it was possible to play not only cartridges but also software supplied on discs, it can be said that it was a good machine that could be used for a long time.
The top half of the main unit is occupied by the printer like this. On the right side of the cartridge slot, there was a switch labeled "PC" and "Word Processor". If you put this switch on the PC side, BASIC will start up, and if you move it to the word processor side, the menu will be displayed. On the right side of the main unit, in addition to the paper feed roller, there were two joystick connection terminals, a knob for changing the print density, and a 3.5 inch FDD. The left side is only the power switch.On the right side of the cartridge slot, there is a switch labeled "computer" and "word processor". By setting this to the "computer" side, BASIC will start immediately when the power is turned on. . Slide the switch to the "word processor" side and turn on the power to display the main menu. In this case, you can select from "Japanese word processor", "system configuration", and "BASIC".
keyboard part. The word "kanji conversion" was written on the space key, and the function keys were written in blue letters when using MSX-Write. An LED is placed on the upper part of the function key, and it lights up when the power is turned on and the CAPS key / Kana key is pressed.Selecting "Japanese word processor" from the menu will launch the built-in MSX-Write. Looking at the advertisement, it was stated that "as a conversion method, the 'multi-segment kana-kanji conversion method using the longest matching two-segment method' used in 16-bit machines of this period was adopted."
This makes it possible to enter and convert up to 40 characters at once. However, whether the conversion is smart or not is another matter... When I actually used it, it was difficult for someone who was used to the current Japanese kana-kanji conversion system, such as the list of candidates after the candidate was not displayed one after another, and the conversion was not correct unless the phrase was clearly specified. However, considering that it was possible to input at this level in 1987, it must have been quite successful.
The left is MSX mode, and MSX-Write screen when MSX2 mode is selected. MSX2 mode has a wider screen, but in MSX mode, each character is larger, so it's easier on the eyes for a big friend who reads this article, isn't it?If you select "System configuration", a screen will appear where you can select five items, such as screen configuration and background color, according to your preference. If I set it on the MSX2 side in screen mode, I was able to write 30 characters in a row, which is double the MSX setting. Also, this machine has built-in level 1 kanji characters from the beginning, but if you add level 2 kanji ROM in some way, you can use it by selecting from here.
You can change various settings by selecting System Configuration from the main menu. In addition to FDD, you can also choose cassette tape as the document storage destination.Because it was equipped with so many functions, the price was set at 138,000 yen, which is similar to the separate model MSX2 personal computer. In addition, the PHC-23J (WAVY23J), which can be said to be a low-priced model without the printer and MSX-Write, is also on sale for 32,800 yen.
From the left, the back of the main unit has a reset switch, CMT terminal, audio output terminal, video output terminal, RGB terminal, channel switch, RF output terminal, and printer reset button. For the power supply, you can use the so-called glasses cable.
 Manufacturers")


